Authentication
With authentication you can make sure, that only authorized users can access the web interface. In this section, we will show you, how you can setup basic http authentication in IIS. Please make sure you have configured a TLS certificate beforehand. Only with an encrypted connection, the username and password will be transmitted in a secure fashion.
Create a new user
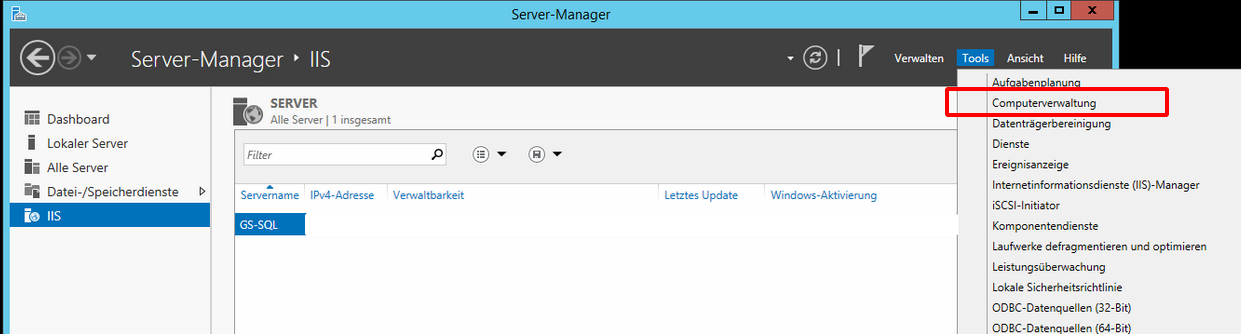
First of all, we need to create a new user, who will authenticate later with our webserver. Open the Server Manager, select "Tools" and then "Computer Management".
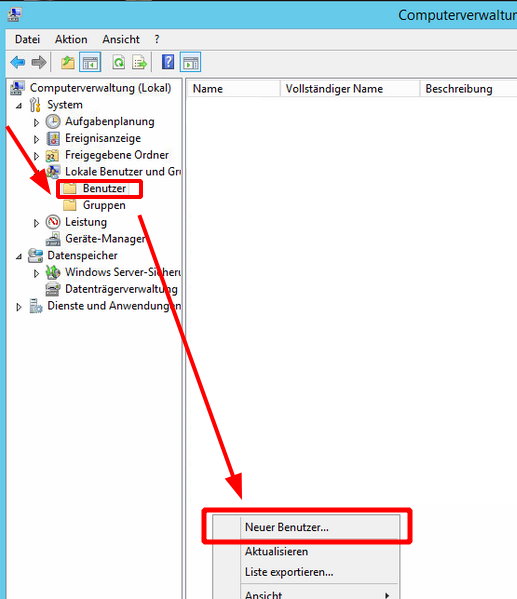
On the left select "Users", right click on a free space and select "New User".
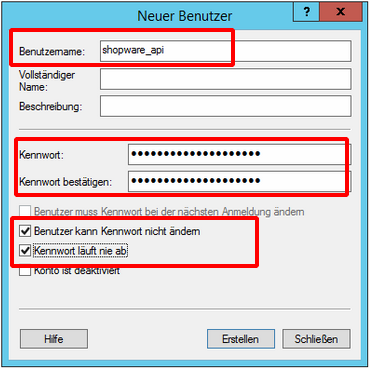
Fill out the form. Please choose a secure password. Make sure to not check that the user has to change the password on next login.
Right click on the newly created user and select "Properties". Select the "Member of" tab and remove the "User" group (the user should not be able to sign in on this computer). Then click on "Add".
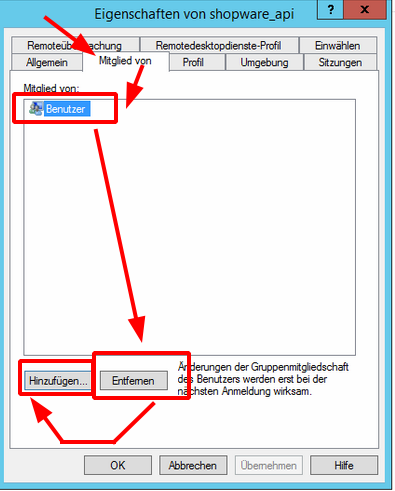
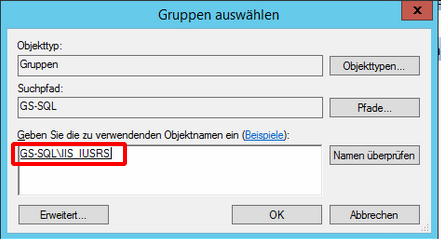
Add the group IIS_IUSRS and save the user.
Enable Basic Authentication
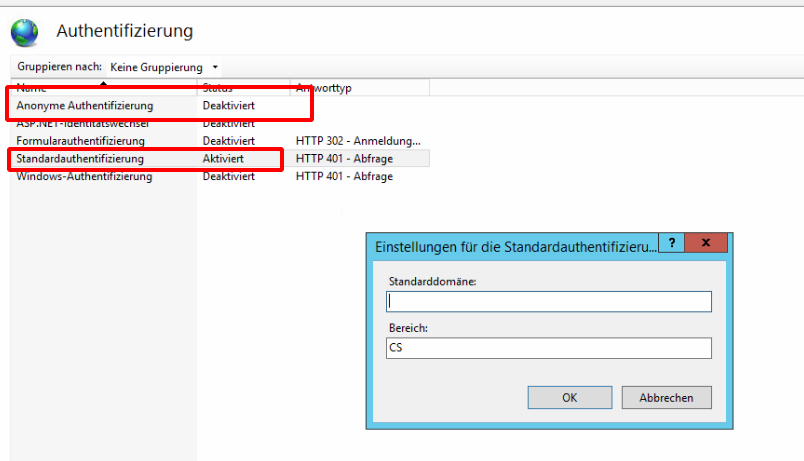
Select the website which contains CS_Webservice or CS_Webservices on the left. Click on "Authentication" on the
right side.

Enable the "Basic Authentication" and disable the "Anonymous Authentication".
Configure the Webservice to accept Basic Authentification
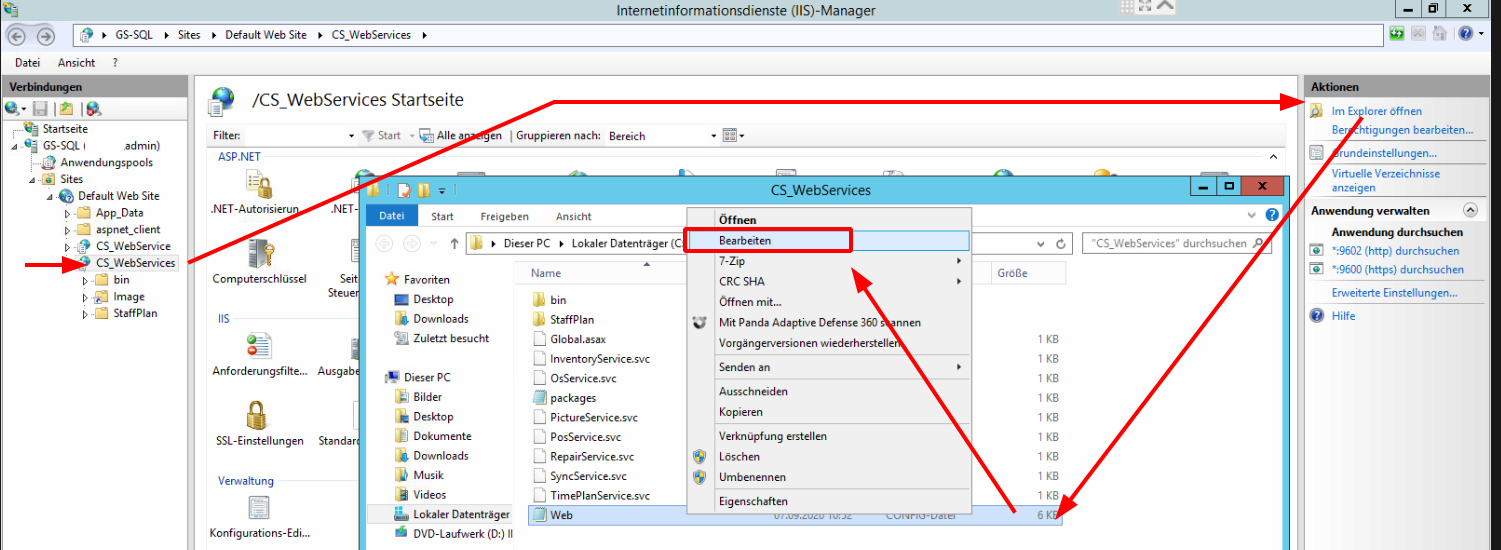
In the last step, we need to configure the Clarity&Success webservice to accept authenticated connections. Select
CS_Webservice or CS_Webservices on the left. Click on "open in explorer". Right click on the "Web" config file
and select "Edit".
Inside the file look out for the following lines:
<?xml version="1.0" encoding="utf-8"?>
<configuration>
    <!-- ... -->
    <bindings>
      <webHttpBinding>
        <!-- Very important part for upload of multipart data! -->
        <binding maxBufferSize="2147483647" maxBufferPoolSize="2147483647" maxReceivedMessageSize="2147483647" transferMode="Streamed">
          <readerQuotas maxDepth="2147483647" maxStringContentLength="2147483647" maxArrayLength="2147483647" maxBytesPerRead="2147483647" maxNameTableCharCount="2147483647" />
             <security mode="Transport"/>
        </binding>
      </webHttpBinding>
    </bindings>
    <!-- ... -->
</configuration>
You have to add <transport clientCredentialType="Basic" /> inside the security tag . At the end, this section
should look like this:
<?xml version="1.0" encoding="utf-8"?>
<configuration>
    <!-- ... -->
    <bindings>
      <webHttpBinding>
        <!-- Very important part for upload of multipart data! -->
        <binding maxBufferSize="2147483647" maxBufferPoolSize="2147483647" maxReceivedMessageSize="2147483647" transferMode="Streamed">
          <readerQuotas maxDepth="2147483647" maxStringContentLength="2147483647" maxArrayLength="2147483647" maxBytesPerRead="2147483647" maxNameTableCharCount="2147483647" />
            <security mode="Transport">
              <transport clientCredentialType="Basic" />
            </security>
        </binding>
      </webHttpBinding>
    </bindings>
    <!-- ... -->
</configuration>
That is it! Please restart the server to make sure the changes will be applied. Click on the main server (usually GS-SQL) inside the left menu and then in the right menu click on "restart server".